So here I am continuing the saga of my seemingly innumerable number of uploads from 2009. We still haven't even reached 2010, and even this blog post which will showcase another 150 videos still won't make it to 2010! So there will be a part three blog post after this one (300-450). I know, so many videos... So let's continue ; )
151) PSU Demo - Approaching #8's Area - Uploaded 8th October, 2009
My first ever video after getting hold of the PSU demo. All I do in this video is jump hack onto the large rock stopper that blocks the valley at the South West corner of F4, climb it as far as I can go then nearly kill Wander in a final jump hack where he lands in the valley leading South to the #8th colossus arena. I then run as far as you can go in the demo which leads to the edge of G5.
152) F5 Valus Before Activation - Uploaded 9th October, 2009
I start off exploring the temple at the back of the arena. I was always fascinated by this temple that looks like it was carved out of the living rock of the cliff face by some unknown stone masons or builders in times past. But it also looks as if some volcanic rock has engulfed part of the lower levels? I've covered this in more detail in my 1st Colossus blog post if you are interested.

In any case, Wander is on the top level of the temple, then I warp him down to the 2nd level and finally to ground level. The whole temple is mired in molasses (you hear that weird machine sound) so I had to use my 'jump hop' technique to get through them, but you do get a different perspective of this structure at least ; )
Next I jump hack through the ground and land on the club Valus is holding. I wouldn't have even known Valus was underground at this location without seeing Pikol's video first. He jumped down there but didn't land on the club. So I was the first person to do this (yay for me!)... I then tried landing on other parts of the colossus but there are no collisions. It was a nice little discovery, Wander standing on the solid club under the arena in a strange silent void - feels like another dimension!

Wander standing on Valus' club before activation
153) C6 South Lands in Limbo - Uploaded 10th October, 2009
A user on the Playstation Last big Secret forums - TresDias wanted me to explore those islands you can see off the coast at C7 "Ah, I just remembered. Did you ever reach those small islands to the south of C6 (I believe)? You said you didn't expect them to be solid even if you did".
So with 'Limbo mode' still active (from a save state) I attempted to get there. I 'warp' Wander South trying to get to them, but I hit an invisible wall and get thrown back (like a slingshot) to the ICO beach. All I had to do here was use Wander's 'gravity codes' and I could have put him directly above those islands, but I was still a n00b at this stage... sure I had learnt a great deal already, but it seems I was stuck using the codes I was most familiar with.

I love how the sword changes the sky to pitch black! In the end I appear to give up on that idea and Wander finds himself at the South Western Cape save shrine at D7. From here I warp Wander South to the D8 invisible lands (see video 115), I then warp East to the H8 invisible lands where the video ends. So, I basically failed to do what was intended - sorry Tres!
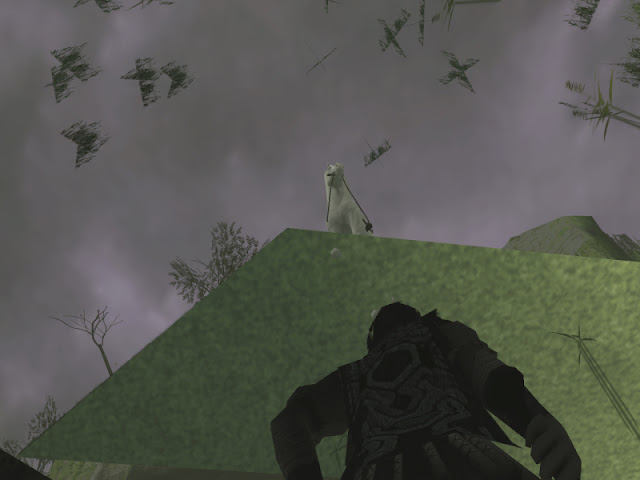
154) G5 #4's Embankments - Uploaded 10th October, 2009
In this video, Wander is exploring up on the hills that surrounds Phaedra's arena (4th boss). I called them 'Embankments' at the time but this actually means 'a wall or bank of earth or stone built to prevent a river flooding an area', so my title was a little off! I guess I should have just called the video 'Area above Phaedra's arena'.
The area is mired in molasses... Wander has a hard time moving anywhere, so again I had to use my 'jump hop' technique. This was my first ever attempt at exploring this area and as such I didn't get very far. In later videos I explore a lot more. Note: If you run towards the edge of the arena then you can keep going, it's only when you try to move in another direction 'away' from the edge that you get stuck.
155) G5 Hidden Room at #4's area - Uploaded 11th October, 2009
Staying in the G5 quadrant, I explored some more and found this cool little hidden area 'under' the field between the four entrances to the underground chambers. Normally when you warp down under the grass in an area like this you will just fall into the void, but in this instance there was a solid invisible floor! The lighting down here is very weird as Wander's face is cast in shadow... almost like he is possessed by Dormin! There's not much you can do except run around the empty room, but it was still a cool little new area that no one had seen before.


Wander's face is a mask of shadows!
Looking up at Agro - directly above ; )
156) F8 Malus After Death - Reprise - Uploaded 15th October, 2009
See (video 44) of my first blog post to see how I made it here before - hence this video is a reprise! So I have outrun the black tendrils and am standing about half way on the main stone bridge (again in Limbo mode). I warp Wander South twice to reach Malus' platform... Malus is not there right now, but I then run to the trigger point that activates the colossus. The Malus death scene appears, however we see the normal version i.e. black bars above and below and it's dark again... same as the normal death scene.
You'll notice my emulator crashes at this point, it did this a lot back in those days ; ) The end of the video was just taking some nice views above the temple.
157) E6 Phalanx Under the Sand - Reprise - Uploaded 15th October, 2009
Here I again try to warp Wander under the sand to fly on Phalanx. At first I put Wander up on one of the rock promontories in the hopes of jumping onto the colossus from this vantage point, but it turns out the colossus never gets close enough to do this. At 01:25 Wander is on the colossus under the sand, but my emulator struggles to maintain the frame rate... I then show how I can 'warp' Wander under the sand at the moment Phalanx dives under it, takes skill to do this - you must warp Wander at the exact second! I fail two times but make it on my third attempt.
But again I get kicked off Phalanx and fall into the void as Phalanx rises up to break the surface of the E6 desert plains. At 03:47 you can see Phalanx diving into the sand... At 04:08 I'm still stupid enough to run towards Phalanx as it dives down into the desert sands, which knocks Wander back > end of video.
158) E5 North Side Towers - Reprise - Uploaded 16th October, 2009
Here I am again next to the North side towers, but this video is a bit of a wasted effort. I warp Wander up high into the sky then try to land on the towers only to discover they have no collision detection... so Wander just falls into the void (derp!)
159) PSU Demo Shrine of Worship (Part 1) - Uploaded 16th October, 2009
I start with Wander on the bridge looking up at the enormous temple! I run towards the open (missing) door that leads down the spiral path to the pool of water... but here we see that there is nothing here, just a shell of the temple with a vast empty void below. So I run up the ramp to the secret garden, stopping to show how different it is to the retail versions.
In fact, I only knew the PSU temple was solid thanks to WWWArea (now SpaceOmega5000) who discovered it first. He made a video - see here: https://www.youtube.com/watch?v=tEk8BMBVPcM
But now I can jump down from the top of the temple - from platform to platform back to the garden! There is a path to follow which Wander can achieve without using up too much of his health. Sometimes Wander disappears under the textures of the temple - this shows us how early this build was. You will hear Wander breathing heavily after he takes a long fall, this would kill a normal person, but Wander survives! He needs time to regain his health, so I crouch down - this is a way to increase Wander's heath faster. The bloom effect makes it hard to see everything but eventually we make it down to a few levels above the garden.
160) PSU Demo Shrine of Worship (Part 2) - Uploaded 16th October, 2009
Continuing on, I explore some more as I make our way down. Finally I make a huge fall back to the platform above the garden, again any normal person would have died from a fall like this, but I worked out that Wander can survive a 16 story fall and live! So I make our way back down the stone blocks to the garden. What an adventure that was!
Next I explore some of the other solid structures in the garden, i.e. top of the entrance gate and the arches surrounding the garden, but the most significant discovery here was that the natural rock platform above the temple waterfall is solid in this version! In all other demos/beta versions this area has no collision! Note: In the PS2 Preview version this rocky platform is the same as the demo.
I run towards what I think is a safe location, only to realise I have passed the edge of the garden and I'm falling down the edge of the temple... Wander is in his 'rolling' animation! Until he hits the ground with a grunt! But he's OK! We see here where the columns were, now just a circular hole in the ground.

161) E6 Phalanx Before Activation - Uploaded 16th October, 2009
I remember having a very difficult time trying to find out just where the 13th colossus existed before it was triggered! The logical location for it would be under the desert where it first bursts out of so majestically in the opening cutscene, but I never saw anything down there? On the playstation 2 forums I mentioned 'I couldn't see it under the sand before activation, there was nothing there, it only appears when the cutscene starts'. Eventually I realised that Phalanx was not in the game zone! That is, that Phalanx was located 'way' down under the death floor - that is the lowest level of the game map (-300m). If (for instance) Wander falls through a glitched texture he will land on an invisible surface 300 metres below the game map, but this colossus was found even further down... in fact, 387 metres deep! So 87 metres below the death floor. So, in this video all I do is jump down and float past Phalanx over and over. Sadly, there are no solid areas for Wander to land on.
162) F4 Wander & Mono Together at Last - Uploaded 16th October, 2009
A very short video (only 28 seconds) showing Wander standing inside of Mono's altar... that is, Wander is intersecting the body of Mono! He is walking through her body and the stone altar she is laying on. Pretty weird I guess, but you can see Wander's feet under the altar at 21 seconds, so we can see here that the stone altar is slightly raised above the level of the temple and that it has no collision detection apart from a 'box' that surrounds it.
163) H4 Avion's Perch - Uploaded 16th October, 2009
I warp Wander from the main bridge to Avion's arena at H4 then land in the water near the dead body of the colossus. I climb on top and move to the tip of its rocky wing, then I warp Wander up high into the air in an attempt to land of the pillar that Avion uses as its perch. Even though my aim is true, Wander just slides off what appears to be a flat platform and glides helplessly into the lake. I try again with the same results. I later discovered that the top of the pillar has a cone or pyramidal shape of invisible collisions, so it's not possible to land there.
164) H4 PSU Demo - Outside Avion's Area - Uploaded 16th October, 2009
I start in front of the large stone stopper that prevents access to Avion's arena in the demo, then jump hack Wander up high into the air and land on the other side of it... reducing my health a lot! I then run all the way to Avion's arena with Wander panting from lack of health, so I take a quick break to regain some. Of course, in the demos Avion's arena doesn't exit, only low res textures can be seen there, and when Wander runs up towards the threshold the game freezes!

Next I jump off the cliffs (with no parachute) because why not! Ha! Well, I was looking for any possible safe ledges to fall on but of course there aren't any... but I didn't know that at the time so I was testing everything. I then try to hug the cliffs in order to get closer to Avion's arena but again I get the crash screen... video ends.
165) F4 PSU Demo - Secret Garden & Dormin's Hole - Uploaded 18th October, 2009
First I start by checking out that mysterious area above the path that leads to the garden. I'd been there before but as this was a new demo to explore I would always revisit areas of interest. Nothing new there of course and I have to 'Wander hop' to get anywhere... in any case I leave that area and enter the garden.
Next I'm on the wall above the large hole that (from below in the main hall). The wall isn't completely solid so Wander falls back into the garden. Then I jump hack up onto the stoney area above Dormin's hole. This area isn't walkable in the other demos, but in this version you can run around up there freely. It's strange how in some versions there are collisions at a certain spot, but it others there aren't. I then explore some other rocky platforms around Dormin's hole with one leading to the columned support that lies adjacent to the entrance door. I would have been great if the developers had made it possible to get up here in the retail versions... sadly that was not the case. Finally I slide down a rocky surface and end up falling into Dormin's hole with a grunt.
166) G4 PSU Demo - Bridge Out Ahead - Uploaded 18th October, 2009
I start standing on the South side of the bridge that leads North into G4, but there is no bridge! In this demo all the bridges are either missing or have a wide gap that prevents further access. Strangely, in the OPM demo, this bridge is the only one intact? An oversight by Team ICO, or did they want players to explore beyonds the bounds of the demo?


Large gap in the F4 bridge
So the only away across for me is to jump hack 'North'... which worked well, I land on the grass on the other side of the chasm. I must have warped Agro over here as well as in the next scene I'm riding Agro further North towards the bridge that leads to the G2 forest (just West of Pelagia's arena). However, this bridge is intact as you were never meant to get here in this demo ; ) But as I make my way across this bridge I get another crash report as we have come to the very Northern edge of the demo area map.
Next, I'm on the other side of the broken bridge in F4 (the bridge in the above image). That is, I have already warped Agro and Wander across the gap, but strangely, I'm not facing North, I'm facing South towards the large gap! What was I thinking here? Was so long ago, I have forgotten now... but then I ride Agro off the bridge into the void below and die, where the video ends. Not sure why I did this... maybe I just wanted to see what would happen?
167) G5 PSU Demo - Phaedra's Area - Uploaded 18th October, 2009
I start on top of the giant rock stopper that blocks the way to Phaedra's arena. You can see that this rock is so huge it even has some small trees growing out of it! I then proceed to run all the way along the dark shadowed path to the entrance cave. Of course there is nothing here as it's only a demo with the first colossus playable, but I just wanted to check the area out. I then run down the path that hugs the cliff wall and reach the large flat field where we see the burial mounds in the distance. There the video abruptly stops! Not sure why I didn't explore further?
168) F3 PSU Demo - Quadratus' Area - Uploaded 18th October, 2009
This video should really be called 'Exploring Quadratus' lake' as that's pretty much all I do ; ) I start by warping Agro South into the lake, close to the culvert waterfall that exists on the far side cliffs. I ride Agro through the murky green water, then something strange happens! The water becomes crystal clear and we see the landscape as if there is no lake here? I was quite amazed when I first saw this! Wander can even dismount Agro and run around as if there is no water. It's a strange rocky landscape of mottled brown and green patches with nothing more than the ambient sounds of the wind.

Crystal clear water reveals the back of the culvert


View of the lake with no water effects - you can see how the textures repeat
Next I try several times to jump up onto the rocks surrounding the culvert structure but die each time. In fact just walking too close to the structure you hit an instant kill zone. Then I'm running West away from the culvert but as Agro follows she starts falling over and neighing over and over as if she has hit a kill zone, yet Wander is unaffected? But run too far West and the collisions end and Wander falls helplessly into the void. I explore the lake on Agro some more until I reach the East side cliffs. Here Argo is halted by an invisible wall, but Wander can climb it! But, it's just another death (kill) zone so Wander dies over and over... oh well, I did test everything I could back then!
Finally, I ride out of the lake and check out the huge stone door that we see Quadratus break through in the cutscene. I warp Wander to the other side (inside the cave), and look at the stone door from the other side, I then run inside the door... that is, there's a large void inside the door that Wander can stand in. I warp back to the beach to end the video.
I think this was one of my favourite PSU demo videos, so I recreated parts of it in high quality - here:
169) Beta Mega Mountains (East) - Uploaded 19th October, 2009
I start outside the entrance door of the temple up on top of the bridge, then I warp Wander West to the very edge of J7. I float down through the white haze of bloom to see the structures emerge... I can't warp into the J column itself as it's protected by a freeze barrier, that is as soon as Wander passes the threshold from the I column to the J column on the map, he freezes in place and you need to restart the game... or in my case reload the save state of the emulator. Note: there is no sound in this video apart from Wander opening and closing his chute.
Here you can see the long thin wall (only a pixel wide it seems) that separates the mountains. Next I'm higher up and looking down so we can see more of the landscape here. As Wander floats slowly down in each cut of the video he is moving North along the I column - just West of the J column. Note: I'm above the beta mountains now! In previous videos I was such a N00b that I always warped Wander 'under' the beta mountains... but I was learning more and more with each new video.
Pretty much the rest of the video has Wander frozen at various intervals North along the Western edge of the J column, but for some reason at J4 there is no freeze barrier here, so Wander can float down with the parachute and get a better look at these cliffs which are very different in colour to what we have seen so far. Brown lands with distinctive rippled rock like hills and just a small section of the ground left over. This would have continued West into I4 where it is now believed the discarded Phoenix colossus was located.
Brown lands at J4
So I continue North passing the Eastern edge of the cliffs that lead to the beta Dam (however I don't visit it in this video) and on and on until I hit the Northern most map quadrant of J0. The wind effects reappear here after an almost completely silent video. Overall, I'd say it a pretty boring video to watch unless of course you had never seen the beta mountains before... at the time I made this video there wasn't a lot of videos about the beta mountains, except of course for Pikol's now famous videos, but his videos were far superior in quality than mine.
170) Beta Mega Mountains (West) - Uploaded 19th October, 2009
Same type as above except this time I'm exploring the beta mountains in the A column. I start standing on the bridge then warp Wander West to A0, then A1, A2, and finally to A3 which feature those weird non-textured, silvery looking cliffs. It should be noted here that at the end of the video I'm using the gavity hack as you see Wander bobbing up and down while floating in space. I this instance I used it to fly around the model, but as soon as you get too close you pass beyond the barrier and freeze! Later I worked out a way to stop Wander from bobbing up and down like that ; )

Strange non-textured lands at A3
171) H0 Beta Mountains - Uploaded 19th October, 2009
Same type of video as above, Wander starts on the bridge then warps North to H0. It's within a freeze zone but it appears I keep warping North-East until I reach the upper right corner of the map. When I bring up the world map sometimes it seems I'm just beyond the confines of the map! Not a very exciting video to be sure ; ).
172) A0 Beta Mountains - Uploaded 19th October, 2009
Continuing in the same vein, Wander starts on the bridge then warps North West to A0. I'm floating above the vast empty flat plains frozen in place, so to move around I have to reset the save state then jump hack a little further South each time to map the perimeter. Later I'm on the far West edge of the plains and you can see the Shrine of Worship far in the distance. When you watch examples of my videos like this today you realise how perfunctory they were back then. But I made them more for mapping reasons than entertainment.
173) D3 Area Behind #9's Cave - Uploaded 22nd October, 2009
I start by jump hacking my way up on top of the cave towards the back. There are huge areas to explore behind and on top of #9's cave, although a lot of the areas are the molasses type where Wander gets stuck... some others have no collision at all. But it's yet another cool out of bounds place to explore and at the time these out of the way places had never been seen before by other fans, which of course was part of the appeal for me to keep making videos ; )

Large area behind Basaran's cave

Panned out view of the East side cliffs behind the arena
So I'm running around on invisible surfaces behind the cave and making my way down quite easily. When you are on a surface that has those molasses type attributes you can usually run in one specific direction, such as down the slope, but to try and run up the slope will not be possible. At 2:12 in the video you will see these dark spheres floating under the cave roof, these are huge rocks that are suspended above Basaran's cave. When you trigger the colossus these rocks fall down and throw up explosions of dirt that you can see in the cutscene. This is to give the impression that once the colossus wakes up and starts to shake, it dislodges some rocks from above, which fall and create this awesome display of power!

Rocks suspended above the colossus before it is triggered
Wander standing on a rock (E3 demo)
Next, I move Wander East away from the cave along rocky surfaces that lead down into a thicket of trees that you can see from the main geyser field of the arena. These are nothing more than trees that you see on the cliffs above from a distance, but (for me) I wanted to get up close to them. You will see I take the same path three times until I work out how to navigate the around the molasses areas and void holes! But eventually the cliffs lead me back down to the regular playing field where Agro is waiting ; )
174) D3 Hydrus Towers (Reprise) - Uploaded 22nd October, 2009
Very short video. All I do in this video is fall down past the towers (columns) at the very back of Hydrus' arena to get a close up look at them. There are no collision surfaces this far out so Wander just falls into the void each time as he floats down past the columns.
175) C2 Cenobia Before Activation - Uploaded 22nd October, 2009
Very choppy with terrible frame rate... however there is something interesting in this video! I start standing on the stairs facing the temple with Cenobia perched on top (before it is triggered), then I jump hack my way onto its head in the hopes of landing there! It takes several attempts where each time I adjusted the memory editor co-ordinates slightly in order to reach the 'sweet spot!'
Most of the time Wander lands on Cenobia's head and is violently kicked off, so Wander falls down onto the staircase as the cutscene of the colossus starts. So I try this over and over, looking for that sweet spot where Wander can stand on the frozen colossus.
But one attempt (at 1:20) kicks Wander up into the sky to an amazing height, a glitch in the game for sure. In fact at 52 seconds in the video you can see a precursor of this glitch happen, Wander glitches but isn't warped up into the sky, however his posture is the same as the glitch and the heath value reduces a little... Note: I couldn't reduce this red health bar value during this glitch, it is locked! He falls into a corner of the temple in the end, and I move him back up to land on the temple.
I land on Cenobia's head and can move Wander around somewhat. After that I warp Wander to Cenobia's head a few more times and stand there triumphantly.
176) D2 Basaran Before Activation - Uploaded 23rd October, 2009
I start by jump hacking my way up onto the roof of the cave above the stationary and silent colossus... then I warp Wander down through the roof and float down with the parachute to get a better look at the turtle colossus. At first I float down in front of it, not far past the trigger point that activates it, but as I try a few more times I end up falling down onto its head.
Sadly, this colossus has no collisions on any part of its body, the whole beast is a ghost! Next I fall through the centre and then the tail section in search of a solid area, but Wander just falls through to the sandy ground below, triggering the colossus each time.
177) B4 Dirge Before Activation - Uploaded 23rd October, 2009
Very short video, only 29 seconds long. The sand snake colossus 'Dirge' or 'Narga' as the developers called it, starts below the surface of the sand dunes, so I simply warp Wander below the surface and look up as I float down with the parachute. You get a pretty clear impression of its horizontal posture and direction but nothing more.
178) B4 Dirge Before Activation (Reprise) - Uploaded 23rd October, 2009
Not satisfied with the above video I made another one where I warp Wander down through the various parts of the colossus. So I start with the head and with each cut of the video move further and further down towards the tail. Again, like Basaran, Dirge has no collisions so Wander just falls through each part of the colossus, but unlike Basaran, below Dirge there is no ground, just an empty void that leads to the death floor (-300m below)!
You'll notice (at 16 seconds) that even in its non-activated state the mandibles of its mouth are moving! Apparently, the mandibles purpose are to pull sand into its mouth where it's melted at high heat and converted into energy for the colossus!
179) F1 Celosia Before Activation - Uploaded 23rd October, 2009
I jump hack Wander up into the chamber Celosia jumps down of when it is triggered. Strangely, the colossus is facing the wrong way with its head towards the far wall and its tail facing out? It's a very choppy video... back then my computer wasn't fast enough to run the game well in the PCSX2 emulator, but that didn't stop me from making videos ; )
I move around the colossus to see it from the front and the back in its frozen state before activation, jumping a few times to show it has no substance (another ghost). Yet, later I found out that this colossus does actually have some solid pieces on it if you know where to look, so I made a recent video about it:
180) PSU Demo Edge of the Map (Part 1) - Uploaded 23rd October, 2009
In the PSU demo, like the other two demos (OPM & PAL) only the nine centre squares of the map are playable with all the surrounding landscape made up of low res models. So in this video I basically ride up to the edge of the playable map squares and look over the threshold... not sure why I thought this was a good idea at the time?

PSU demo map with only the 9 centre squares playable
First I start at G4 looking East into H4 where we see a low res model of Avion's temple, then I'm at G3 at the bridge that leads to the G2 forest, but only part of it is high res. You see a flock of birds here, they were removed in the final version of the game due to memory issues. You can see as I ride across the bridge Agro is hard to control, this is because the horse has no programmed path for the bridge in this demo as they never expected anyone to try and ride across it.
Next I'm at F3 on the desert sands running along the edge of the playable map... the bloom effect is quite fierce here, but Wander just runs along the edge until he stops at a cliff wall. Then I'm in E3 running up the pathway towards the #3rd colossus E2 arena (Gaius). There's really nothing special to see beyond the maps squares, just broken geometry and low res polygons...
Still in E3 I'm running near the Ravine Entrance save shrine North until I hit the edge. Then I start to run (Wander is on foot btw) South down the West edge of the playable map where the video ends.
181) PSU Demo Edge of the Map (Part 2) - Uploaded 23rd October, 2009
I'm still running on foot down the West side edge of the map until I reach the earthen bridge in E4 that leads South into the E5 forest. The video cuts and I'm running South into E6 towards the small desert temple that triggers the #13th colossus (Phalanx), but hit the edge of the map before reaching it. So I'm at the very South West of the playable map here.
I head North again but fall into a void on the rocky mountain I was traversing which takes us to the last part of the video... running South East towards the G6 valley where the cave to the #8th colossus (Kuromori) is located. Of course I can only reach the South edge of G5 here - video ends. Overall quite a boring video and worth your time watching it' )
182) PSU Demo Shrine of Worship (Part 3) - Uploaded 24th October, 2009
See part 1 (video 158) and part 2 (video 159) above.
I start by jump hacking Wander from the secret garden straight up onto the top of the temple. Then, like Pikol and WWWArea's videos of the PSU demo temple, I drop down from ledge to ledge without a parachute which causes Wander heavy injury at times.
Note: WWWArea's video was uploaded in July, 2009 and is of much better quality and frame rate than mine - so check it out here:
In any case I make my way back down to the secret garden via jumping down from ledge to ledge. There are several different routes you can take, but this one is the most obvious. But I remember having a lot of fun playing around with this! Good times ; )
183) C7 Islands - Uploaded 28th October, 2009
I start standing on a high rocky outcrop at the edge of the cliffs at D7 facing West. I then jump hack West into C7 and float down with the chute to get a better look at the two small islands you can see from the cliff face. The bloom is really intense here, but you can see that the islands disappear (or melt away) as Wander gets close to them. As shown above in (video 152) it's not actually possible to see these islands up close as they are only low res textures. But I gave it my best try!
184) B8 Blue Lands - Uploaded 28th October, 2009
I start standing on the same high rocky outcrop at the edge of the cliffs at D7. I warp Wander out to the B8 blue lands and move around the perimeter. I then attempt to warp further West and seem to appear at A8 where the map stops and Wander can go no further. I continue South along this line until I reach the very South-Western tip of the world map... the 'Farthest Lands' for sure!
It appears these map squares are blue to denote water or an ocean... but apart from that they are a complete mystery. But they are within the freeze zones, so when I warp Wander to these map squares he is frozen in place.

Later I could make Wander stand on the blue lands and move around
185) I8 Beta Mountain and Triangle - Uploaded 28th October, 2009
When watching these old videos today (in 2022) I sometimes have to laugh at the terrible quality I see there ; ) The bloom effect in this one is particularly intense, however that's just how the game ran back then, before I found a way to turn the bloom effect off.
So from the Northern East most corner of D8 you will see a mountain floating there... this was first found by a user named Khfan1 in October, 2008 based on Syd-tiger's discovery of the solid H8 map square... but you can read more about that in my 'Beta Mountains' blog. But in this video all I could do was warp Wander up high enough to see the mountain and as I fall back down (using the chute) you can also see the Blue Triangle at I8. I then warp further East to see more of the beta mountain, but don't get very far in this early attempt.
186) Dormin model - Uploaded 31st October, 2009
Now we have arrived at a turning point in the Shadow of the Colossus story. A Youtube user named 'Youmoosotc' created a way to extract the models and animations from the game for the first time. He called his viewer the 'Dormin editor' and posted some videos on his Youtube channel showing what you could do with this amazing new tool. Sadly it appears his Youtube channel is no longer active, but luckily I had archived all of his SotC videos before this ; )
However, you couldn't just download the program and run it, you had to build it yourself following many steps in a tutorial. You had to download a lot of files, then copy and replace files in certain folders etc. Then use CMD (commands) to create an index file... if all went well you could then use CMD to open a window that showcased a colossus and its animations.
His tutorial video can be watched here: https://youtu.be/qIQ11bED8q4
So in the end I got it working, and the first thing I did was to check out Dormin's animations.
Dormin 3D model & animations
187) Quadratus Model - Uploaded 1st November, 2009
2nd boss, named 'Boss_A' by the developers (based on the very first NICO video which previewed the mammoth colossus being taken down by a group of horned boys). Getting the Dormin editor to work took a long time and, for me at least, I needed help from the creator of the editor (his name was Malc) but he was always helpful when I had a problem to solve. Once you had it running, the editor had a help screen that listed all the functions you could use when viewing the model simply by pressing a certain key on the keyboard.

Dormin editor help screen
188) Quadratus Model (Reprise) - Uploaded 1st November, 2009
Seems I wasn't happy with the previous upload, so I made another (updated) version.
189) Gaius Model - Uploaded 1st November, 2009
I won't comment on some of these videos as they are all the same type, i.e. I load the model, change its texture or lighting properties and animate it while moving the camera around etc.
190) Mono Model - Uploaded 1st November, 2009
You'll notice Mono has no head here like we see in the OPM demo secret garden. This might explain why we see a headless Mono there, as the head is a separate object. At the time I didn't know how to add the head object to the body model, but Malc later released a video on his Youtube channel called 'Now with heads' - which you can watch here:
191) Above the Clouds No Bloom - Uploaded 1st November, 2009
We now change gears and move away from the Dormin editor. I uploaded a different video where Wander starts high above the clouds and then falls all the way back down. But we are in Limbo mode here as we can see the intense motion blur as he falls down towards the lands and the sky is a pale blue. Not sure where I am actually, it seems he lands somewhere in G3-G4?
192) A5 Beta Triangle- Uploaded 1st November, 2009
There's a tiny little triangular piece of textured land floating out in the void West of the South entrance to Dirge's cave (10th colossus). Must be a leftover of some other land that existed out there in earlier builds? However, I tested it in the E3 demo version and it's not there. I went to the exact co-ordinates where it appears in the US and PAL versions but it is way out beyond any of the extended lands we see in the E3 demo. So it remains a little triangle of mystery! Nice to know there are still some things that keep their secrets in this game ; )
In the video Wander is falling down onto the triangle using the parachute to get a closer look at it. I do this four times before the video ends. Later, I could stand on it (in the US version) via using the 'standing hack' which WWWArea found. See image below. Note: I'm not actually standing on it as it has no collisions, Wander is standing still in the air, so it appears I'm standing on the triangle.

US/PAL version A5 beta triangle floating in empty space

E3 demo version A5 beta triangle... nothing is there!
193) F4 Shrine of Worship in Limbo Mode - Uploaded 1st November, 2009
If you've forgotten what 'Limbo' means, I used this expression as a way to explain what happens after Wander escapes the black tendrils of a colossus. You can no longer bring up the map, the sky has no clouds - just a single colour. There are no animals present (i.e. birds or lizards) and the game looks sharper as there is no longer any bloom effect.
So in this video I'm basically just checking out the Shrine of Worship (temple) or as the devs called it the 'Sky Tower'! You'll notice when I pan the camera around the sky changes colour from a kaki green to sky blue... frame rate suffers when I'm in the temple at this early stage of my videos (sorry).
194) Avion model - Uploaded 2nd November, 2009
We are back to the Dormin editor models - this one is Avion (5th colossus) in the retail version (4th colossus) in the demos and was called 'Bird' by the developers. Note: None of the following Dormin editor models have any sound.
195) G4 Islands & Waterfalls - Uploaded 2nd November, 2009
Still in 'Limbo mode'... I remember precisely why I made this video! A user on the Playstation 2 Last Big Secret forums (SotC_Seeker) said he had noticed a 'boat' down next to an island in G4, specifically below the cliffs you ride over on your way to Avion (5th colossus). "The 'boat thing' is near number five, you know the little lake with an island in the middle? It's close to the rocks ur on so go all the way and look down"

So I was bemused by this statement and had to check it out! But I saw nothing like that, just the island (although it is somewhat boat shaped). But we do get to see how Wander dies when he lands on the island a few times. In fact, the game doesn't end after Wander dies... it just continues and we see no 'death screen'? Very strange.
I responded to SotC_Seeker with this comment:
Well, I checked out SotC_Seeker's island and I'm sorry to report that there is no boat moored there. I think I know what he is looking at but I went there without the bloom lighting and managed to jump down there as well. It's just a boat shaped rock, but as you get closer it doesn't look like a boat anymore. Sorry to burst your bubble SotC_Seeker!
As of today (November, 2022) I don't see any boat shaped rock? Just the island... perhaps the island was the boat? After that, I warp Wander to the G4 waterfalls... and die every time.
196) Alternative Shrine of Worship Model - Uploaded 4th November, 2009
The next dozen or so videos will be showcasing different 3D models using the Dormin editor. This one shows the Shrine of Worship hall as it appears in the end cutscene way off the playable map in the A column. This is where the cutscenes take place.
197) Item Models - Uploaded 4th November, 2009
Features the Queen's sword, cloth of desperation (parachute) - which incidentally doubles as the cloak Mono is wrapped in from the opening cutscene... explosive arrow, the cloak of deception, the Shaman's mask, the lizard stone, the Shaman's cloak, eye of the colossus (which is only accessible in the Preview version - legitimately), the mask of power, fruit tree map, mask of the titans, sword of the sun, mask of strength, harpoon of thunder, cloak of force and the whistling arrow.
198) Mono Head & Hair Models - Uploaded 4th November, 2009
We see Mono's headless body, then her head model with only a crew cut hair style! Then the longer hair model which can move in a breeze etc.
199) Argus Animations - Uploaded 5th November, 2009
15th Boss (Minotaur 3). All the human type colossi start standing in a T-pose but the animations are not in any particular order.
200) Avion Animations - Uploaded 5th November, 2009
Seems I made another Avion video (see video 192 above). Not sure why I did this, but it's a little longer than the first video.
201) Celosia Animations - Uploaded 5th November, 2009
11th boss, named 'Leo' by the developers (as in Leo the lion) as it resembles this beast somewhat... at least in body shape.
202) Pelagia Animations - Uploaded 5th November, 2009
12th boss, named 'Poseidon' by the developers (as in the Greek God of the sea).
203) Phaedra Animations - Uploaded 5th November, 2009
4th boss in the retail versions, 5th boss in the PSU Preview and Preview versions, named 'Kirin' by the developers (as in a giraffe like beast).
204) Phallanx Animations - Uploaded 5th November, 2009
13th boss, named 'Snake' by the developers.
205) Wander Head Stages - Uploaded 5th November, 2009
There are eight Wander head models that are used during the game, one new head appears after each two colossi killed. This reveals the slow progression Wander suffers as he continues to defeat each colossus and take in the black essence each time. For some reason, in this video I only show five heads?
206) Kuromori Animations - Uploaded 5th November, 2009
8th boss, named 'Gecko' by the developers.
207) Hydrus Animations - Uploaded 5th November, 2009
7th boss, named 'Eel' by the developers.
208) Beta Dam Model - Uploaded 5th November, 2009
I show this model in parts, that is each part of the i2 model one after the other, instead of a fully rendered complete model. That was all I could do back then...
209) Gaius Animations - Uploaded 5th November, 2009
3rd boss, named 'Minotaur 2' by the developers.
210) Valus Animations - Uploaded 5th November, 2009
1st boss, named 'Minotaur 1' by the developers.
211) Quadratus Animations - Uploaded 5th November, 2009
Another Boss_A video, seems I worked out how to display some more advanced animations!
212) Barba Animations - Uploaded 5th November, 2009
6th boss, named 'Minotaur 2' by the developers.
213) Basaran Animations - Uploaded 5th November, 2009
12th boss, named 'Turtle' by the developers.
214) Dam & Beta Mountains (Preview Version) - Uploaded 6th November, 2009
OK we have moved on from the Dormin editor videos for a while... at this point in the history of the game we were blessed with getting a new 'never before seen' full version of the game, which was dubbed the Preview Version'. If you want more info about how this build (disc) was found then check out my Preview version blog post here:
My emulator was still struggling with the frame rate here, however, in this video I warp Wander to the Dam at i2 but the bloom washes everything out... next I warp Wander to the beta mountains directly East of the Dam and we see Wander frozen there. So, the title of this video is misleading as we don't see the Dam ; )
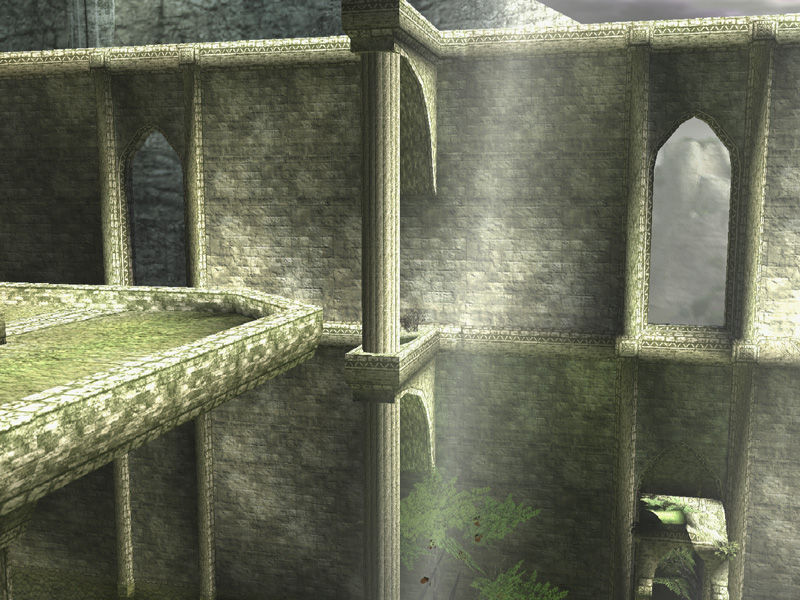
215) Shrine of Worship is Solid (Preview Version) - Uploaded 6th November, 2009
My emulator was still struggling with the frame rate, but the Preview version temple was a new milestone for SotC fans as although the demo version temples had solid platforms, you couldn't hang onto any edges, but in this version you could! Also, the upper temple levels were in a much more finished state than the demo versions (OPM & PSU).


Amazing views in this version (camera even pans out here)
I start in the secret garden then warp Wander up to the top of the temple (in less than a second)! Then, like the demo videos (see video 159) I proceed to drop down from level to level. At 2:05 you can see how the devs have added a new mottled green texture above the brick texture below it. Then, the video ends before I make it all the way down to the garden? Perhaps I had planned to make a part 2, not sure?
216) Secret Garden Platform (Preview Version) - Uploaded 6th November, 2009
One other important detail only found in the Preview version confirmed that it was once possible to climb up the stacked stone blocks at the back of the garden which was denied players in the retail versions. I think nearly every player that climbed those blocks and then saw there was no way to the staircase above must have thought there 'must' be a way to get up there. This was the original 'spark' I believe that ignited the search for secrets in Shadow of the Colossus!

However, in the Preview version we see something very different! The stone blocks are stacked up one more level so that Wander can actually reach the staircase.

I think Ueda made a error here by reducing the number of stone blocks and denying players to reach the upper platform of the secret garden. Perhaps it was something they were forced to do (based on PS2 memory issues), but leaving that enigmatic staircase just out of reach was what caused players to start hacking the game (which Ueda isn't a fan of).
In any case, when you climb up to the upper platform there is nowhere to go except down again. But in the Preview version there is a large open window on the East side wall, it's offset a little to the North of the entrance to the garden. In the retail versions this window is bricked up!

Bricked up window in the retails versions
So, in this video I climb up the stone blocks then run all the way to the end of the upper platform facing the open window. I then fall off the edge of the ledge and attempt to do a backwards jump to reach the edge of the window.... but fail. In the next video I succeed!
217) Secret Garden Window (Preview Version) - Uploaded 7th November, 2009
Based on the last video, this time I jump from the upper platform ledge and grab hold of the window ledge then pull myself (Wander) up to stand where I attempted to go in the previous video. But now I'm here, where am I supposed to go? I jump down to the path leading the garden.
WWWArea tried to work this out in one of his classic videos - here:
So perhaps there was once a way to climb all the way up to the top of temple. In the PSU demo there are solid areas you can walk on that do not exist in any other version, but there is still no obvious path that goes up! All paths lead back down to the garden.
218) D1 Underwater at Hydrus' Lake - Uploaded 8th November, 2009
I start facing the outer wall of Hydrus' arena facing West, I then warp Agro and Wander down to the very bottom of the lake (the deepest lake in the game)! Down here, it's dark and deep, I try to make Agro move by kicking her sides, but she is locked in place like a statue! Then I take my bow and shoot up at the silhouette of Hydrus swimming above!
Nothing happens, so I dismount Agro and float back up to the surface. Then we are back down at the bottom of the lake sitting on Agro... I dismount again and float all the way up to the surface - video ends
219) D6 Barba's Door - Uploaded 10th November, 2009
In this video I try to ascertain if there are any collisions next to the mysterious doorway we see high up on the temple at the back of Barba's arena. From a distance you can see that the third tier or level of the wall temple has a dark arched doorway... surely this is a passage to some secret area!
But sadly, like the cliff temple at the first colossus arena (Valus) this temple also has no door... it's just a 'false' door that doesn't lead anywhere. So in the video I warp Wander up then float down with the chute a few times passing the false door. In the early days (before we could explore places like these), there was a lot of speculation about where this door might lead... if only we could reach it somehow!
Mysterious closed off door at the top of the temple
220) C2 Cenobia Trials - Uploaded 10th November, 2009
You can hear how slow this video is via the music score, my emulator was having a hard time with this! Yet, even so, it's one of my more impressive early videos from the time I think. I launch Wander up from the trigger point then land on the stairs in front of Cenobia (the same as in video 173 above). Next Wander is standing on top of the long narrow building in the centre of the arena and then warps right next to the inactive Cenobia. The cutscene starts and you can see Wander just standing there on the platform.
Now Wander is on top of the temple and Cenobia is down below (the situation has reversed). Cenobia runs towards the temple, but just gets stuck at the bottom of the stairs... it just keeps running on the same spot. Wander shoots some arrows at the colossus, but nothing happens.
Next, we are at the stone platform with one solitary column (I called this the 'Rook' platform as the column reminds me of that piece on a chess board). But its twin column has been broken in times past and now lies sunken deep into the grass...

Second broken column fell many years ago it seems
So Wander is on top of the Rook column and Cenobia is trying to ram it. But as with the main temple it just runs on the same spot and Wander is totally safe up here! Next we see Wander is riding Agro towards the main temple on the South side of the arena... suddenly Cenobia appears and rams into Agro, causing Wander to fall off, he jumps towards the head of Cenobia, but then the video changes again.
I remember why I recorded the next part. It was a request from someone at the time, I think it was a comment left on one of my videos for Wander to jump up really high so the whole city complex could be viewed at once. It was so much fun running around at the very top of those platforms and archways back then, I'm so glad they were solid ; )
221) F5 #1 Area Models - Uploaded 10th November, 2009
Location name: Temple. Note: the next 21 videos will be more of the Dormin editor type showcasing all of the colossi arenas and some others.
222) F3 #2 Area Models - Uploaded 10th November, 2009
Location name: Proto.
223) E2 #3 Area Models - Uploaded 10th November, 2009
Location name: Arena.
224) G5 #4 Area Models - Uploaded 10th November, 2009
Location name: Kirin's Hill.
225) H4 #5 Area Models - Uploaded 10th November, 2009
Location name: Canyon.
226) D6 #6 Area Models - Uploaded 10th November, 2009
Location name: Canossa.
227) D1 #7 Area Models - Uploaded 10th November, 2009
Location name: Lakeside.
228) G6 #8 Area Models - Uploaded 10th November, 2009
Location name: Underground.
229) B4 #10 Area Models - Uploaded 11th November, 2009
Location name: Gravewind. I have bypassed the 9th Colossus arena (Basaran) for some reason?
230) F1 #11 Area Models - Uploaded 11th November, 2009
Location name: Leo's Cave.
231) G2 #12 Area Models - Uploaded 11th November, 2009
Location name: Poseidon's Lake.
232) E6 #13 Area Models - Uploaded 11th November, 2009
Location name: Desert.
233) C2 #14 Area Models - Uploaded 11th November, 2009
Location name: Ruins.
234) G1 #15 Area Models - Uploaded 11th November, 2009
Location name: Parthenon.
235) F8 #16 Area Models - Uploaded 11th November, 2009
Location name: Sanctuary. I always thought this was a strange name for this arena as it means a 'place of protection where one feels safe'. But how are we protected here in this most dangerous of arenas? Perhaps it refers to the tunnels Wander must run through as they provide protection from the devastating blasts from above? However, according to Greek mythology a sanctuary was a place where worshippers participated in ritual and required a large open space. So perhaps Ueda took some inspiration from this?
236) F0 Entrance Temple Models - Uploaded 11th November, 2009
237) F4 Secret Garden Models - Uploaded 11th November, 2009
Location name: Home.
238) F4 Shrine of Worship Models - Uploaded 11th November, 2009
Location name: Home.
239) Fruit Models - Uploaded 11th November, 2009
240) Dormin Animations - Uploaded 11th November, 2009
241) Agro Animations - Uploaded 11th November, 2009
242) Animal Models - Uploaded 11th November, 2009
243) Mono Head Animations - Uploaded 11th November, 2009
244) Items Models (Reprise) - Uploaded 11th November, 2009
245) Dead Colossi Models - Uploaded 12th November, 2009
246) F8 Malus Before Activation - Uploaded 12th November, 2009
I posted this message on the Playstation forums at the time: Check it out guys! Malus before activation (Andrew: I finally did it!) Well, I had tried to get to Malus before it was triggered in the past but had always failed, but this time it worked and I found myself in Malus' arena in the daylight! This was the first time anyone had ever seen the arena in the daylight as far as I'm aware... was an amazing moment for me so early on ; )
Of course, Malus is a ghost before it's activated (like a lot of the other colossi) but when you run up the ramp just below it, the cutscene still plays as it does in the game. I run around for a while showing that the colossus has no substance, jumping through it, throwing harpoons and even showing the inside of its huge feet! Finally, I trigger Malus, jump hack to its base then jump hack to its head and stab twice with the Queen's sword to kill it.
247) Baby Wander Animations - Uploaded 12th November, 2009
Another video using the Dormin editor. Body and head are separate models.
248) F5 Agro in #1's Arena - Uploaded 14th November, 2009
In some early screen shots of the game Agro is shown in the first boss arena (Valus). So, I warped Agro and Wander up there and did some tests. Interesting that even on Agro the colossus still triggers, however the horse is warped back down to the bottom of the chasm as the game will not accept Agro being up there while the cutscene plays! We will see this happen in future videos as well.

Early image of Agro in the first boss arena
Agro is frozen and floats backwards while the cutscene plays out, it's like what happens in the Preview version when you use the 2nd controller to warp Agro up into the sky, when you land, Wander falls off the horse and Wander is stuck in a strange animation (Pikol called it 'cripple mode' but perhaps a better name for it could be 'wonky mode'? )... and once Wander jumps back onto Agro, the curse is lifted!
So I warp Wander and Agro back up to the plateau now that Valus is triggered and walking around freely. The music starts so the game thinks Wander is approaching the colossus (so that is promising!) I ride Agro towards the feet of the colossus and Agro seems to pass through them, yet Wander is shifted sideways as if he is a solid object and Agro is not? You see Wander shift left or right while riding Agro, yet after Wander still snaps back onto the horse.
Finally, I jump off Agro onto the leg of Valus and climb up the colossus in the normal way to its head, but I don't kill it? I jump down and mount Agro again then ride back towards the cliff face and then ride Agro off the cliff! What was I thinking! Agro gets stuck for a while but falls back down - Wander mounts Agro again and they both ride off away from the arena.
249) G1 Agro in #15's Arena (Reprise) - Uploaded 14th November, 2009
Back in video 63 I took Agro with me into Argus' arena but didn't show what happened after the boss was triggered, so I made a reprise video to show what happens. We start riding towards the trigger point at the back of the arena (I'm on white Agro this time) but as soon as Argus awakes, Agro & Wander are sent back to the starting temple, just like what happened with Valus in the above video.
Agro is sliding backwards and then starts trotting strangely... Wander is also acting strangely, as he dismounts he rolls backwards and seems to have trouble walking properly or grabbing onto a ledge, so here again we are in wonky mode. In this mode Agro does not respond to Wander and Wander can have a hard time getting back on the horse. But as said above, when you mount Agro again all returns to normal.

#15th boss arena - an architectural wonder!
I try again with the same results... Wander and Agro are sent back to the starting temple, but this time the camera is above Agro, and when Wander dismounts, he dies! Very weird... Not sure why I thought it would be different the second time? Next, I try something different, I ride Agro up to the trigger point, then dismount. Wander triggers Argus as usual, and when the cutscene ends we see Agro is still there. But Agro is now a ghost horse with no substance? Seems I'm not convinced as I spend a lot of time jumping through ghost Agro!
Next (via hacking) I ride Agro up onto the bridge Argus breaks with his club in the game... but Agro falls through it as the horse was not meant to be here... this bridge only supports Wander is seems. Then I leave Agro at one side of the bridge and run towards the other side, I get about half way along and start whistling for Agro... she doesn't respond. Then I move closer and closer to Agro but calling her still results in whistles? This should not happen! As you get closer to Agro Wander's calls change from whistles to calling her name. But here, I can stand right next to the horse and I'm still whistling!
I trigger Argus again then make my way up to the bridge where I left Agro, but the horse is gone? Finally at 7:39 in the video I shift gears and try to warp (jump hack) Wander onto Argus' club/sword before activation. I land on it a few times but die in the process. In later videos I succeed in doing this ; )
250) F8 Wander on Agro on Malus - Uploaded 14th November, 2009
I start sitting on white Agro under Malus, then I warp Agro up on top of Malus' head. Malus starts moving around trying to dislodge Agro and Wander... it's amazing how Agro stays the course and remains able to weather the movement below her. After a while Wander dismounts and actually pets Agro up on this high shifting platform! It appears Wander is having a harder time keeping his balance than Agro does, but he finally climbs up onto Malus' head and strikes a heavy blow with the Queen's sword. The subsequent violent movements of the colossus cause Agro to fall off... we hear the horse whinny and when I pan the camera back she is gone.
I abandon Malus and jump down to find my companion, only to see her rush past me and take a suicidal leap off the rear platform, falling to her death! Why Agro, why!? I grab onto the ledge and look down to see the tiny form of Agro lying on the beach far below, all the while being shielded by the blasts coming from the colossus. There's no point in living anymore! I jump down and join the fate of my horse... very sad ; )
251) Lord Emon & Guard Head & Body Models - Uploaded 14th November, 2009
Another Dormin editor video.
252) Dormin Escape Attempt (Preview Version) - Uploaded 14th November, 2009
It was actually Pikol who first made me aware of this glitch in the Preview version in one of his videos about the build. In the retail versions when you play as Dormin in the final cutscene you are restricted by invisible walls when you try and walk the opposite way you are supposed to i.e. towards Mono's altar. But in the Preview version, Dormin can move out beyond the walls somewhat...
I move Dormin up and down but you are still restricted by the invisible walls that surround the temple, but you do get to see outside. Next I move Dormin into the pool room and walk beyond those walls. So pretty interesting but it will be later that I can actually move Dormin beyond this cutscene temple.
253) F8 Malus Battle Part 1 (Preview Version) - Uploaded 15th November, 2009
Note: Pikol had already uploaded a video very similar to this before me. My frame rate isn't so good (as was usual for these early videos), but I start at the gates leading to the final boss (Malus) and shine my sword light onto the central occulus of the imposing stone gates... but in the Preview version the gates don't open, there is no way through legitimately. So it seems the devs hadn't added the code yet that activates the gates to open in this version. So, of course I was forced to hack my way past them. I used Agro's position co-ordinates and simply shifted South. From here on the video is the same as a normal playthrough. I ride Agro up to the bridge, the bridge collapses and I lose Agro, then Wander climbs up the side of the structure to reach the boss and triggers it.
However, I then use the special 'Boss Menu' to load Malus again which reloads Malus at a different location, in fact at co-ordinates 0,0,0. So Malus is now in a different position than it was before, Northwest of the central path of the arena. This means the way to defeat the boss is completely different than the retail versions and adds a whole new layer of complexity to the game! For instance, the barriers used to shield Wander from Malus' energy blasts need to be used in a different way - from their narrow ends. Once you make it into the underground tunnels you also have to be aware of the energy blasts as they are coming from a different direction also... Wander gets hit a couple of times before the video ends.
254) F8 Malus Battle Part 2 (Preview Version) - Uploaded 15th November, 2009
Continuing on from the last video, Wander is running towards the underground tunnels using the barriers to hide from Malus' energy blasts, a lot of dust gets kicked up but he eventually makes it. But Malus's lower body is now blocking the passage! So what can I do here? I try to climb on and find a gap Wander can squeeze through but it's not possible, so in this video I cheat and warp Wander into the belly of the beast (so to speak). I emerge on the other side of the passage at the East entrance where we see two stone obelisks, you then play the game as normal to reach the next level where you would enter another tunnel, but here we must run North up the incline to reach the base of the colossus.
Since you are now at the level (half way up) you can easily jump onto its hand bypassing many steps it would normally take. You then stab the hand, run up the arm, do the backwards jump to the other (right) hand, stab it, shoot at the shoulder and jump across etc. to kill Malus. The cutscene that appears is different as Malus is in this different location - really cool! So it was great to play Malus like this, a completely different way to approach and kill the boss.
Next, I warp Wander down to the lower levels of Malus' body that are now beneath the surface. The lightning flashes still illuminate the platforms even though you are underground, so you can play as normal. I jump down onto its right foot and attempt to jump to the left foot, but fall into the void where the video ends.
255) F8 Malus Time Attack - Uploaded 15th November, 2009
So I had this great idea, 'I know, I'll make a time attack video and do it in record time using my hacks'! But it turned out an abysmal failure! I'm using the US version here (my favourite), I start at the statue of Malus in the temple hall and pray before it - you will notice my best time is 12:27:59 out of a possible 13:00:00! Ha! Wow, I just made it.
So the timer starts and I run up the ramp, then warp Wander directly under the colossus. Strangely, it takes me 8 seconds just to run up the ramp? Then at 11 seconds I warp Wander directly up onto Malus' head, wow - in only 11 seconds I'm already on the head - this is going to be a world record for sure! But, it then takes me 27 seconds just to get my first stab in (Gahhh!!!) Then another, but Wander loses his position and I spend time trying to get back to that 'sweet spot' where Wander stays put no matter how much the colossus thrashes around. It just gets worse from here on until I make the final stabbing blow at 2:00:01. I remember uploading this video but a few hours later removed it in shame!
I mean, I could have practised and got a really great time, but the basic premise of the video was flawed to begin with, so this is one of my videos no one would have ever seen before - which is probably a good thing ; )
256) F8 Modding Malus - Uploaded 19th November, 2009
I made this post on the Playstation 2 Last Big Secret Forums on the 18th November, 2009:
Note: The link in the image above was my original upload, but as mentioned I did a huge amount of removing old videos as they were all different sizes (resolutions) and the frame rates were very slow. But, there were 600 of these! All deleted now but not lost, as I had all my videos backed up.
So it was WWWArea (now SpaceOmega5000) who first worked out how to 'mod' or move a colossus to a new location. I had tried to do this before in the hopes of being the first, but he got there before me. So in this video, I recreate what WWWArea did (as he told me how to do it). I warp Malus up above the platform then warp Wander up so he can run around. But this was only a test or a proof of concept video... Wander doesn't take too long before he drops back down to the ground.
257) F8 Malus Battle Without Storm (Preview Version) - Uploaded 19th November, 2009
This video is basically the normal battle against Malus, except the sky is clear and not stormy. Runs for 7 minutes 38 seconds. Note: Due to the poor quality and bloom effect in this video the sky is pretty much just a white glowing haze, but at times you can see the clear skies.

Clear skies as Malus dies holding its head in pain! Poor thing!
258) E6 Riding Phallanx Up Front (Preview Version) - Uploaded 19th November, 2009
I'm using the Preview version here, but this works in any version (PS2, PS3 or PS4). I start by jumping up onto Phalanx then running along the length of the body towards the head. When I'm near the head I nearly fall off but grab the edge and shimmy closer then climb up. There is a 'sweet spot' on top of its head where you can stand without being forced off by the wind and you can basically ride Phalanx like this for as long as you like ; ) You can also stand on the long proboscis or nose of the colossus but it's much harder to stand still there as the wind keeps pushing you back.
I liked this video so I made a higher res version here: https://youtu.be/UlIp12EsbAI
259) F8 Modding Malus (Reprise) - Uploaded 21st November, 2009
Here is an update to the previous video (253) above. This time instead of just moving Malus up, I move it South and then to the North. When you do this, Malus' feet shoot out at 90 degrees to the inverse of the direction, that is if I warp Malus South, its feet are now pointing North etc. I do this a few times South first, each time moving the colossus further away. Then I move it North past the start of the arena and run up to take a closer look. I shoot off an arrow but Malus is still close enough to take a pot shot at Wander and it's a hit!
Next, I'm back at the stairs that lead up under Malus, but Malus is still to the North where I left it. Here you can see the stairs haven't rendered, so you can see below the arena - the inside of the cliffs and the ocean way down below. I run down the invisible stairs into the invisible tunnel until it renders again. I recorded this as I thought it was cool at the time and wanted to see how far I could get before the tunnels righted themselves. Note: Even though Malus is to the North and facing the wrong way it still manages to shoot off a blast of energy while I'm in the tunnel!
Finally, I jump up onto Malus then move it South. It was really weird climbing over the colossus when you are floating out in the void! I have also moved its feet back under the body so they are not sticking out at 90 degrees. I then jump down some levels of the skirt and jump onto its right foot, I think I had planned to climb all the way back up to its head from here? I try to jump to the left foot but miss and fall to my death - end of video.
260) G1 Modding Argus - Uploaded 21st November, 2009
Here I take control of Argus and make it do whatever I want! If you are 'not a fan' of Argus then you might get a laugh when watching this as I really abuse Argus in this video! First I make Argus jump up and down, then I warp the colossus into the East valley where we see it fall down into oblivion! I do this again, but this time I jump down next to it, using the parachute I get a few seconds to look into the cave below where Argus climbs up from during the cutscene.
Next, I warp Argus up into the sky from the cliff where it emerges to the West where the six large pillars are that we first run through to enter the arena, and it falls down and gets stuck there! I run towards the now immobile colossus and take a look at it from ground level. This is one of those situations we have never seen before in the game or since as far as I can tell! The colossus is stuck at the top of the six massive columns. So I jump hack up and land on the colossus with the parachute... the music starts again. Then I use the Queen's sword to stab the head symbol then jump down and stab the chest symbol. I then crawl my way down and stab the weak spot that makes Argus drop its weapon, but since it's embedded into a stone column nothing happens. I also can't climb down to the hand symbol as this is also embedded inside of one the pillars...

Argus stuck on the columns

Closeup of Argus stuck
Finally, I warp Argus beyond the pillars into the large plain before you first run up the stairs towards the six large stone columns. But here the colossus just falls through the floor.

Screen shots of Argus when it was just about to fall through the ground!
261) H4 Modding Avion (Preview Version) - Uploaded 22nd November, 2009
I'm using the Preview version here as I wanted to show something special that only appears in this version of the game. I trigger Avion then bring up the Boss menu by using R1 + SELECT then select 04: BIRD from the list. Press CIRCLE to bring up another menu, this asks you (in Japanese) Colossus or Stone (i.e. do you want to play the colossus again or start back at the temple), I select Colossus, so the game 'reloads' Avion. We start back just after the trigger scene, but now Avion is not on its perch? So where is it?
When you use the Boss Menu twice, Avion will be loaded at the 0,0,0 like the above Malus video (251) so now Avion is under the water in this instance. So I jump down and swim towards Avion while the cutscene sounds are playing again... I reach one of the water platforms then use 'X' on the controller to zero in on the Bird's location. You can see Wander's head point in the direction of the colossus, even though we can't see it. I use my bow to zero in on the Bird's location then jump into the water and swim towards it. As I get closer you can see the head and wings of the birds stretched out just under the surface of the lake.
As soon as Wander touches the colossus, it activates and flies up out of the lake! Very strange, we have never seen anything like this before. Avion under the water that is triggered by Wander swimming toward it? Note: In the old emulator I was using back then the game crashed, so we get the same crash screen we saw back in PSU demo video (164). So I try two more times but get the same results.
262) Wander Head Animations - Uploaded 25th November, 2009
An update to video 'Wander Head Stages' (video 203). Here we see Wander's head animations, that is seeing how Wander's eyes and lips move when he speaks. You'll notice a weird thin texture glitch attached to Wander's left eyelid, this might be due to how the Dormin editor rendered the model - but I have no idea actually?
263) G6 Modding Kuromori (Part 1) - Uploaded 26th November, 2009
So far I have modded Malus, Argus and Avion and now I've moved onto Kuromori. This was the 'time of modding colossi' where WWWArea and I competed to see who could mod a certain colossus first! It was a friendly competition of course and in the end I think we both ended up with an even balance of colossi each... well, from memory WWWArea was a little ahead ; ) But that's OK!
So I start off by freezing the colossus then jumping down to the floor of the colosseum, the battle music starts and we see the Gecko's eyes glow blue. I then jump onto a leg of the colossus and then onto its neck, just behind its head, here we can stand without any danger of being kicked off. I even move the camera down to take a nice shot of Wander as if he is the King of the Colossus and has control over this enormous beast!
Next, I shrink (or scale) Kuromori down half its size but Wander has trouble jumping onto it. I then scale it down even further... it's like maybe the size of a large crocodile now? Then I unfreeze it and you can see it thrash around on the ground. It starts crawling along the surface leaving huge footsteps in its wake. The video changes and I scale Kuromori up to twice its size, it's now so huge parts of it stick out beyond the colosseum... video ends. See part 2 below (video 270).
264) E6 Phalanx Special Menu (Preview Version) - Uploaded 26th November, 2009
Here I use the Boss menu to (double load) Phalanx, as in video 250 above where I used the menu to load Malus twice. Since Phalanx is a flying colossus, when you load it again it just starts above Wander at the small ruined desert temple, this is the 0,0,0 co-ordinates of the quadrant for the #13th boss. So there's nothing so special about this video... and also the bloom effect here washes everything out.
265) F8 Unique Perspective of Malus - Uploaded 26th November, 2009
Here I continue on from video 256 (above) where I warped Malus further out above the ocean. As in the previous video, here I take Wander with Malus as I launch it out above the open ocean to the South of the arena. From here I can run around on its outstretched legs that are facing North. Again, this is one of those situations you would never have seen in a Shadow of the Colossus video before... That is, Wander walking on the outstretched legs of the final boss?
I shoot some arrows at Malus, hitting it in the shoulder and then the head, then jump from the right leg to the left. I then run up to the body and look back at the two legs stretched out to the North, you would think I would start climbing the colossus here, but no - I jump back down onto the right leg again and shoot another arrow at its head... video ends.

Updated screen shot of Wander on Malus' legs
266) D3 Modding Basaran (Preview Version) - Uploaded 26th November, 2009
I trigger the colossus and watch the short cutscene, then just when it's about to blast Wander with an energy bolt, I use the Boss menu and select the 'Tortoise' colossus again. This reloads it to the 0,0,0 co-ordinates of the quadrant (as seen in previous videos) which just happens to be above one of the geysers! So I run on foot towards Basaran just as the geyser runs out of steam... it blasts me but I'm close enough for it to do its stomping attack, so it will stay put as long as Wander doesn't move.
So I don't have to wait long for the geyser to start again and watch as Basaran totters helplessly on two legs as the stream of hot water sprays up and keeps it immobile. I don't bother trying to shoot arrows at its feet or anything, I just wanted to show that 're-loading' the colossus in the Preview version would make it much easier to take down as the first step of leading the colossus to a geyser is basically done for you when you use the Boss menu.
267) Colossi 1-3 Special Menu (Preview Version) - Uploaded 26th November, 2009
Here I use the Special (Boss) menu to reload the first three colossi, that is I use the menu to start the battle with the first boss (Valus) then bring up the menu again and start the fight over. As shown in some of the videos above, depending on which colossus you do this with it will start in different locations when loaded twice.
It was Pikol who first did this with Malus as he got his hands on the Preview version a little earlier than others (including me) and as such had some time to play around with how the Boss menu worked. So here we see Valus reloads back almost at the same spot it starts in, although a little further West. Next I use the same procedure on the Mammoth colossus (Quadratus). Here we see it crash through the stone door as usual but when I reload it, it appears at the other East end of the beach! Pretty amazing!
Finally, I warp to the 3rd boss (Gaius) and reload it but it just disappears? You don't see it, but when it's reloaded it appears away from the platform and falls through the ground down into the void. So in this instance you can't play this colossus once you have reloaded it.
268) Escaping the Alternate Shrine of Worship - Uploaded 26th November, 2009
Here I have managed to warp Wander away from the ending cutscene where he is being sucked into the pool of light. As you will recall, Lord Emon throws the ancient sword (Wander's sword) into the pool of water at the back of the temple which (via some unknown alchemy) transmutes the water into a massive pillar of light that draws all dark energy into it. Wander was possessed by Dormin, but now all of Dormin's essence has been sucked into the pillar of light leaving only a demon version of Wander.
So as Demon Wander I warp him up above the temple and we can see it's just the main hall model with a little land surrounding it, but the bloom effect in this video is really intense so it's hard to make out any good details. I warp Wander up above the hall, then warp him out into the open fields but he just falls through the ground. Next, I try landing just South of Mono's altar, I was looking for any places where there might be some collision detection or solid surfaces I could land on, but sadly there are none. So I warp above the pillar of light (just for fun)... the rest of the video is just Wander floating down in different locations trying to catch a glimpse of the surrounding lands.
269) F8 Modding Malus West - Uploaded 26th November, 2009
Based on the video above (262), here I warp Malus West instead of South. Wander is now exposed to the energy blasts from the colossus without having any barriers to hide behind. So I run down into the tunnels. Note: At 35 seconds, you actually see one of the tear drop shaped energy blasts pass through the tunnel! Very weird. Wander reaches a dead end, so I warp him directly onto Malus (which takes a little modifying my codes while in map mode).
I land on Malus' right shoulder... hmmm, seems I was a little off target! I then jump down onto Malus' leg which is again sticking out from the direction I have warped it, this time the legs are pointing East. I run down the leg onto Malus' foot and look back at the arena from this impossible location! Malus will not shoot you when you are on its body, it would be like shooting your own foot with a gun. Sadly, I make a small mistake and Wander slides down the foot and falls to his death!
270) G6 Modding Kuromori (Part 2) (Preview Version) - Uploaded 26th November, 2009
In this video I'm again using the double Boss menu reload technique, this time on the 8th colossus (Kuromori). Kuromori is unique among the colossi as when you warp it outside of its arena it doesn't just fall through the ground into the void like most of the others do. So when I first tested this I just followed the sounds of the colossus as far as I could as I didn't know where it had reloaded, then warped Wander up really high and saw the gecko just chilling out in the void beyond the colosseum.

Gecko out of bounds beyond the Colosseum
So I fall down onto the Gecko a few times trying to land on it, but Wander has no parachute this early on, so he hits the lizard hard as if he is hitting the ground after a large fall and dies! But where he lands is different each time, some of them are quite amusing!
271) E6 Agro on Phalanx - Uploaded 27th November, 2009
Seems I used two recordings to make this video as at the start we see Black Agro, then a little later Wander is riding White Agro. But basically all I do here is ride Agro under Phalanx as it floats majestically above the desert sands, then I warp Agro up in an attempt to land on the colossus. I miss the mark a couple of times, but then I make it. I ride Agro on the spot against the onrushing wind, jumping off and on the horse expecting something different to happen perhaps?
It's funny how Agro seems to keep its balance as the huge snake like colossus undulates horizontally. Note: this movement appears mammalian - that is dolphins and whales swim like this in the ocean, however 65 million years ago the 'Ichthyosaur', a dolphin like animal undulated vertically, that is it moved its hind tail side by side instead of up and down like a fish or a shark... fascinating I guess! Eventually Agro falls off so Wander follows. Next we see White Agro spinning in a strange way in front of one of the giant flaps that cover the sigils of the colossus. Here is a point in the collisions where Agro gets stuck and this glitch has been posted many times since by other Youtubers. Agro's textures seem to flash as well, and Wander is still mounted on the horse as you see when they both slide off and fall the ground.
272) I6 Beta Mountains (Preview Version) - Uploaded 27th November, 2009
Just a short video of Wander sitting on Agro at the Eastern bluff cliffs (H6) looking up at the visible beta mountains in the I6 quadrant. In the retail versions there is nothing in I6, but in the Preview version you can still see the mountains floating high above in the sky! Although from below they look like a flat surface. You will also notice some other distant mountains, these are in the I7 quadrant but I will discuss those later.

I6 beta mountains in the sky - you can also see the I7 mountains
I dismount Agro then warp Wander up and float down with the parachute to get a better look at the mountains. However the bloom effect washes out a lot of detail so you don't see much in this early video. Later videos will show this area in better quality.
273) H8 Invisible Lands (Preview Version) - Uploaded 27th November, 2009
Just a short video of Wander visiting the H8 invisible lands in the Preview version as they look completely different to the retail versions. In fact, they look exactly like the blue lands that are found at the Southern edge of the map in all PS2 versions. I start on the cliffs looking down at H8, then a few seconds later, appear on Agro down at the invisible floor... as you can see the floor is a deep aqua blue. I then ride Agro across these mysterious blue plains until we reach 'crash' wall! This happens in the Preview version, but not in the NTSC (US) version.
 Deep aqua blue invisible lands at H8
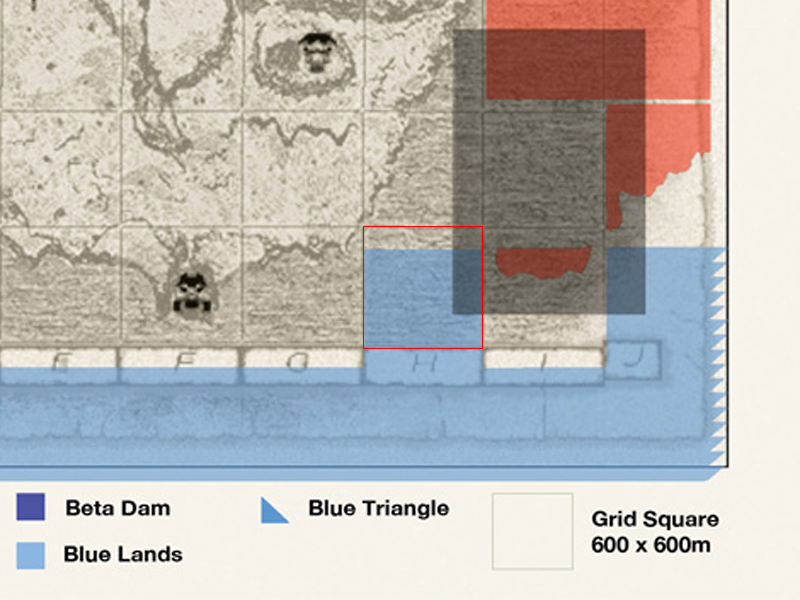
Dark rectangle is the crash area in the Preview version
274) F3 Modding Quadratus - Uploaded 28th November, 2009
I vividly remember making this video as I woke up much earlier than usual that Saturday morning and decided to mess around with Quadratus. For most of this video I just move the colossus around the beach, warping it up high and watching it fall back down, pushing it into the lake where its legs get bent out of shape in weird ways etc. When I move it too far out into the lake it falls through the surface and into the void below so I had to reload my save state ; ) I also lock the colossus in place so it can't move forward and at around 4:33 Quadratus seems to float above the beach... until its four legs at last touch down again ; ) Note: This was the first time I actually felt sorry for what I was doing to Quadratus!
Finally, at the end of the video I warp Quadratus up from the beach and watch it fall through the dirt path we ride down to reach the beach. It falls straight through it! I was trying to find places it might walk on above the beach area... but sadly there are none. You will hear the music in the video is much slower than normal but speeds up at times, I was still using a screen recorder so it recorded every slow down or speed up in the frame rate. You will also notice that the colours are over saturated in this video. I did this when editing the video as an experiment but never did so again.
275) F1 Modding Celosia - Uploaded 28th November, 2009
This video is somewhat similar to the above video as I'm just moving (warping) Celosia all around the place in weird ways! I warp Celosia down to the ground level East of the temple then I jump down with the chute and let the colossus try and attack me! But again, I have locked Celosia in place so it can only run on the spot! Ha! I have full control of this beast now! I then warp Celosia high up into the sky, but when it lands I'm struck and sent flying back... seems my hubris was misplaced ; )
I then warp Wander up out of the temple and land on the desert sands above. Since I have taken over the controls of the colossus, I do the same thing and we see glimpses of it rising above the sand and then falling back down. As with Quadratus (above) Celosia cannot land on any surfaces beyond the confines of its arena.
Lastly, I have to admit to being surprised at how well I could warp Wander short distances! At 2:59 in the video I warp Wander from the other side of the temple to the ledge that looks down on the ground below. I then run towards the larger pond at the East side of the arena and force Celosia into it... the colossus just falls through the water into the void below (just like how Quadratus did in the above video).
276) H4 Landing on Avion (Preview Version) - Uploaded 29th November, 2009
Strangely, I had labelled this video file as just 'Avion_PV'. But I have changed the title above to better illustrate what the video is about. So I bring up the map then lock Wander's position co-ordinates so that I will land on Avion, then when I return to game Wander is instantly warped to those co-ordinates. Pretty cool and it shows how I was getting better with my accuracy when launching Wander to specific places. So I land on Avion a few times and ride around for a while, you'll notice that the dramatic music doesn't kick in until long after Avion has left its perch. Next I grab onto its tail and finally fall in front of the colossus to get a different perspective - video ends.
277) H4 Modding Avion - Uploaded 30th November, 2009 (605 views)
This video suffers from the bloom effect coupled with the low quality, but you can still make out what happens. Wander is standing on one of the platforms in the lake facing Avion perched on its pedestal, I then shift Avion up and down and up again. Note: When I say 'shift' I mean I'm moving the colossus up and down using its position co-ordinates. So here I have taken control of Avion's position co-ordinates and as such can move the colossus around anywhere I want. However, in this early video I only move it up and down, not East/West or North/South, that will be revealed in later videos.
I shoot Avion to trigger it and as it starts flying around the arena I again move it up and down. So you will see it flying under the surface of the lake and then high up in the sky above. Next you see Avion gliding above the water in a strange pose with its wings outstretched and its tail trailing behind parallel to the surface of the lake... the video changes as Wander is holding onto Avion's wing as I move the bird low across the surface of the lake! As Avion is so low it passes through one of the ruins - Avion passes though it like a ghost, but Wander is solid and gets stuck... luckily just in time he grabs onto the very end of Avion's tail, but I drop Wander into the lake as Avion flies past one last time.
278) D1 Modding Hydrus - Uploaded 1st December, 2009 (1,329 views)
Wander starts standing at the edge of the sloped platform in the lake. In the distance you can see Hydrus pitched vertically in the lake, it's tail upright and its head under the surface of the water. As Hydrus' tail twists around in strange ways it knocks Wander into the lake, so here I found a way to turn Hydrus 90 degrees from the surface of the lake and as it moves around it looks very peculiar. Next I move Hydrus up into the sky so it looks like a flying colossus. You'll notice how its head ticks up and down slightly... And that crazy tail! Even from a long way away it still manages to knock Wander into the lake!
Next I have locked Hydrus at the surface of the water so it can't dive down into the depths! We see Wander swimming towards it, I climb on only to be kicked off, but then manage to grab on and run along the colossus towards its head. Strangely, I can easily run past the electrified spines without being shocked? Video shifts and Wander is holding onto Hydrus - I have moved it up high above the arena, but here some strange things happen. Hydrus' head is squeezed into it's neck and Wander seems to be stuck between them...
Wander falls down into the lake... the tail again brushes against Wander! Lastly, we see Hydrus from a distance floating high up in the sky, then it dives down with amazing speed back into the lake.
279) E5 Forest/Shrine of Worship Save Stone - Uploaded 6th December, 2009
Wow, five days have passed since my previous upload... this must be a record! I start in the E5 Autumnal forest, having previously found the E5 save stone's position co-ordinates. So now I can move the E5 save stone around with Wander standing on it. I first shift it up into the canopy of trees, then jump down. Here we can now see an empty recess where the save stone used to be.
Next, I shift the save stone much higher up, this makes Wander warp up even higher as the save stone acts like a launching platform for him. Luckily, Wander has the parachute so he can safely land on the save stone as I move it up to meet him. Looking down from this amazing vantage point, we can see the forest below and the lands beyond it stretching out towards the horizon. Interestingly, you can still pray at the save stone and choose to save the game. Note: It was WWWArea who first found the position co-ordinates for a save stone.

WWWArea first warped a save stone up into the sky (22 July, 2010)
Lastly, I shift the save stone South towards the first colossus arena and even go underground at one point. From underground I launch Wander up even higher than before and bring the save stone up to him. You can see the landscape below but due to the bloom and my low quality video it doesn't look very impressive : (

280) G2 Modding Pelagia - Uploaded 6th December, 2009
We start with Wander standing on top of one of the gazebo like structures and see Pelagia moving up and down, like it's jumping for joy! I time my jump so that I land safely on the colossus, you can see its energy blasts shoot backwards in this instance... I bring up the map and warp the colossus South. In this video I was trying to move Pelagia out beyond the arched main gate structure, into the lake above the waterfall. But as soon as I do, the colossus just falls through the water into the void below, Wander however hits the bottom of the lake with a grunt then swims to the surface. I try this a few more times in the hope that in some place Pelagia can land on a solid surface, but to not avail.
Next, I have frozen Pelagia up above the arena, Wander jumps down and swims towards it. I jump hack up and float down with the parachute to land on it. I climb up and reach its head, suddenly it rears up! This was a surprise as I had frozen it. So I warp Pelagia further South above the West side of the waterfall, then in front of the waterfall but as before it just falls into the void. Note: Even after this many videos I'm still using a crude screen recorder and my PCSX2 emulator is only running at about 12-15fps.
281) B4 Modding Dirge - Uploaded 6th December, 2009
For the first few minutes of this video Dirge is flying above Wander as I have shifted it up out of its sandy environment into the air. So as we watch it undulate around the arena you can see the smooth movements of the colossus and get a nice view of how its mouth parts work (or mandibles). You can see a glowing white light in its mouth and I always had the idea that as it moves through the sand its mandibles pull sand into its mouth where it is energised or converted into energy somehow? I can't remember now if I read this somewhere or it was a theory I came up with... Of course Dirge would need to generate a temperature of 1700 degrees celsius to melt the sand which would turn into a liquid glass, so as a food source this seems unlikely.
Next I move Dirge down below the sand then make Wander follow it using the parachute, not sure what I was trying to show here, but it only lasts a few seconds. Then I lock Dirge's up/down position co-ordinates so that it surfs just above the level of the sand and then try to jump onto it. This is nigh on impossible as Dirge is programed to kick Wander off its back unless the colossus is unconscious after slamming into a wall. So you will hear a 'gunshot' sound as Wander is kicked off. I try everything I can to keep a hold of the beast, but you lose a lot of heath with each gunshot! A few times Wander dies unceremoniously on the back of the huge beast before I can even get a single sword stab in!
As with the Hydrus video (278) above, I then change Dirge's position from horizontal to vertical, so we see it moving around with its head in the sand... very weird, but I get punished for my sacrilege! It moves towards Wander at great speed and he can't get out of its path in time! So he is hit and knocked unconscious! Lastly, my favourite part of the video is Wander standing atop one of the rock columns looking at Dirge as it curls up into a ball! Reminds me of an eel in the ocean as they can twist around like this. Dirge then unfurls itself and heads back down into the sand where it belongs... most probably very happy that this (modding) nightmare is finally over! xD.
282) F4 Shrine of Worship Save Stone (Part 2) - Uploaded 6th December, 2009
In video 279 we left off with me moving the save stone South towards the first colossus arena, so here is the rest of the video. Note: Wander still has his pink wobbly hair thingy! We see the save stone move by itself and Wander falling off as he tries to ride it. Moving the save stone up or down with Wander is easier as Wander only gets shifted up, but moving it in any of the other directions causes Wander to lose his balance and fall off, which gets tedious very quickly! So I moved the save stone a certain distance (in steps) then made Wander run up to it. It's quite amusing to see the save stone moving like this, as if it has a mind of its own ; ) But once you move it beyond the boundaries of its native quadrant it will disappear.
Next, I'm back at the temple and move the save stone up to the level of the main hall, then start shifting it North. It passes right through Mono's altar causing her model to glitch! Strangely, I tried to replicate this recently but saw no effect? So I'm guessing there were other addresses that I had modified here that caused this. I did mess around and change a lot of address values back then that had strange outcomes.

Save stone intersecting Mono's altar
I then move the save stone (with Wander) up higher to get a better look at the statues > above the temple hall > then much higher up above the temple. Next we are in the pool then high up into the shaft above the pool, where the video ends.
283) D6 Barba's Tower - Uploaded 6th December, 2009
Here I stack the stone barriers Barba smashes through when chasing after Wander. I place them one atop the other to create a high tower that I hoped Wander could climb. You can see in the video how I move each barrier piece into place (like magic) while Wander stands still watching the tower grow. Once finished, I move away to look at my amazing achievement! The barriers tower up above Wander to great heights!
Sadly, these barriers have no colossion detection... this will be a problem for me in many subsequent videos. So when Wander jumps above it he just glides through the surfaces. I then jump up to the top level of the arena to get a better look at the structure, it seems it's just about the same height... so approximately 30 metres high. Next, when wander stands in the spot a barrier once occupied he instantly gets teleported to that barrier in the tower! Very strange... my guess is the collision part of the barrier is still in situ and when Wander touches it he gets flung to the barrier model it's linked to?
284) F4 Modding Mono - Uploaded 6th December, 2009
Here I move the static model of Mono around the temple and outside. First I move her into the pool at the back of the temple in what looks like a strange baptisim ritual! Next I move her South out onto the grassy plains in the direction of the first colossus arena where the video ends. So there's nothing special here, just a video of moving Mono North, South, Up and Down.

Wander and Mono in the pool (contrast adjusted)
285) Gravity Cape - Uploaded 7th December, 2009
Even though I had used the 'gravity hack' in previous videos (the first being video 48 - 14th August), it seems I decided to make a dedicated video about this amazing and very useful effect. From what I remember, it was the legendary 'Radical Dreamer' who first found this code and then passed it onto Pikol, who showed it to WWWArea who then showed me ; ) So I start in the temple and then lift off up through Dormin's occulus until I'm above the temple hall model. You can see the white square that provides the light that streams down through the circular hole, but since I have no parachute here Wander slams back onto the floor and dies! Note: Wander still has his ugly pink testicle looking thingy on his hair! Sadly, this appears in subsequent videos also.
So I try again, just not as high this time but still lose some health when landing. Next I take a closer look at the so called 'diving board' feature high above Mono's altar which I first showed way back in video 23 that has no collisons. Then I warp Wander high up above the temple from the pool at the back of the temple, but of course the top part of temple isn't loaded yet so all we see is the low res shell of the temple below and the circular stone tube that leads back to the pool. Again, without the chute to slow our landing Wander dies! Finally at the end of the video I warp Wander up about half way between the temple and the first colossus lair, but this time I have the parachute so I land safely!
286) C2 Nomad's Temple - Uploaded 8th December, 2009
I think this is one of my favourite videos of all time! I spent hours making it but the results were well worth the effort! First I travelled to Cenobia's arena out of turn, that is when the colossus was not loaded so I could spend my time working out the position co-ordinates of all the structures without having to worry about Cenobia attacking me all the time! Then I spent many hours looking for the camera codes of each column, base and structure and saving the co-ordinates into my Tseach memory editor. I won't bore you with the details save to say that once the video begins you will notice the arena looks very different than usual!
We can see an empty field in front of us devoid of the columns and barriers we are used to seeing. Where did they all go you might ask. Well, I deliberately keep the camera away from the 'big surprise' at first but show how one of the columns has fallen into the canals that surround the field of columns. Wander jumps down onto it then jumps out onto the field to reveal (drum roll)... Nomad's temple!
Amazing! Well, here I had used the columns and platforms to build my own unique structure. I had no blueprint or plan, I just placed the structures where I wanted then moved them around until I had what I thought looked like a temple of sorts. So I warp Wander up and take a better look at the whole temple but as mentioned above in the 'Barba's Tower' video I had no way of making the collisions work so that I could actually 'climb it' - this came later.

Nomad's temple - my first attempt at changing a colossus arena
It was possible to climb the lower parts of the columns, but Wander just falls off... Finally I jump above the temple and through some other structures just to show how they are ghosts, then Wander runs through a line of columns and takes one last look at Nomad's temple ; )
287) D1 Hydrus Above Land - Uploaded 8th December, 2009
Here I have found the position co-ordinates of the eel colossus (Hydrus) and taken it out of the lake. Wander doesn't even need to be in the arena for this to work! So Wander is on the outside of the arena and we see Hydrus floating above the land... at first we see it stuck in the air straight as an arrow, then it turns around and heads back to the lake. Wander follows on foot to get a better look at this miraculous encounter! Next, Hydrus is a long way back to the South and moving steadily North towards the lake.
Hydrus floats majestically in the air with its head dipping up and down slightly, then it moves through the rocky cliffs at the South side of the arena (I guess my aim was a little off) before arriving back up above the lake where it hovers for a while before the video ends. Note: As seen in a lot of these early videos the bloom effect is quite intense here which makes part of the video harder to make out.
288) H4 Avion Up Close (Part 1) - Uploaded 9th December, 2009
This video starts with Avion already triggered and perched on its stone column out in the lake and Wander standing on the upper (second inaccessible) platform. Again the bloom effect is quite intense here... but then all of a sudden, Avion is right up in front of Wander! Here I had found the position co-ordinates of Avion before it starts flying around, so you can move the colossus around but the game still thinks Avion is on its stone column.
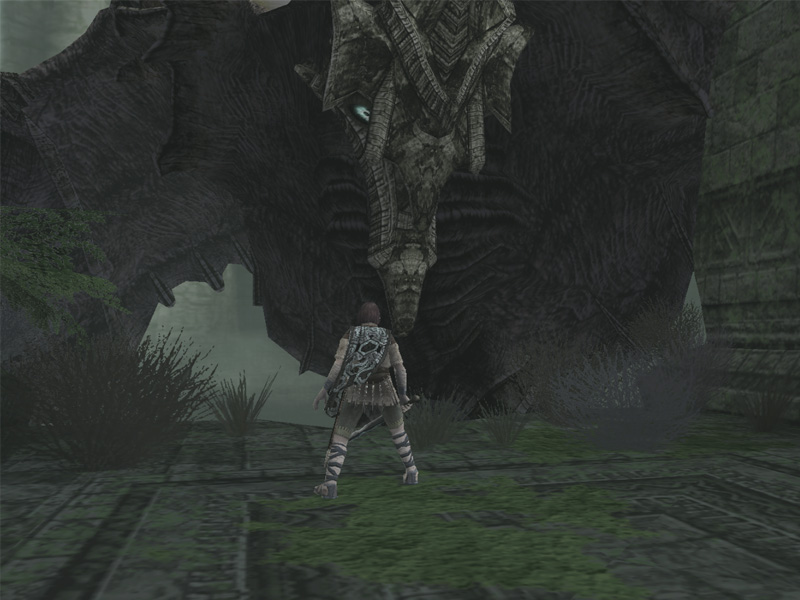
Avion very close to Wander on the 2nd platform of the temple
As Avion has not yet been attacked (i.e with an arrow) the colossus will act like it's still on the stone column where it perches. So Wander can get up really close and even hit Avion with his sword. I move Wander forward then crouch down and look up at the huge bird eyes of Avion peering down. I mean from this vantage point I could look straight into the eyes of the colossus! Pretty amazing!
I then move Avion even further West so that it's actually intersecting the temple Wander is standing on. From here I can clearly see the wing sigil at ground level (or upper temple level in this case). But as soon as Wander walks onto the wing, the program takes over and Avion starts flying. But in this case Avion is flying West away from the lake and its arena. So for the rest of the video I move Avion West past the temple to see how far away I could move it. I can move Avion very far away but as soon as Wander tries to follow it, the colossus just disappears!
But eventually Wander shoots an arrow at Avion very far to the West and makes a hit! The colossus flies back East to the lake and passes over Wander and the temple, and the game continues as normal.
289) H4 Avion Up Close (Part 2) - Uploaded 9th December, 2009
In part two I again move Avion beyond the temple and try to jump onto it, but it just flies back towards the lake with Wander falling with a splash soon after. So then I try something different... I move Avion inside the temple then jump onto it, this time Avion flies West i.e. the wrong way - not towards the lake but towards the outer bounds of its arena and then seems to get stuck in the air soon after (in a T-pose). So Wander can run around the body and wings freely. Note: I have tried recently to recreate this effect without success... My guess is Avion was moved into its 'stand-by' mode somehow?
When Wander stabs his sword into the wing the camera acts the same as in-game, that is it rotates around dramatically, but then we are back at the weird T-pose Avion. So I stab the other wing but suddenly fall off! I find myself on the cliffs to the left of where we enter the arena but Avion has disappeared again... all we see is some black smoke trailing off to the East, back towards the lake.
So I try again and this time I stab both wings then run down to the tail. I stab the tail and the death cutscene starts with Avion majestically falling into the lake - video ends.
290) C2 Messing with #14's Columns - Uploaded 10th December, 2009
So here I am in Cenobia's arena still at my Nomad's Temple (see video 286 above). Here I continue by standing on the first fallen column, that is the column you see to your left when you first approach colossus before it is triggered. I had moved the column into one of the water canals, and this is where this video begins. I move the column up and as such Wander is shifted up by the movement of the column! He flies high up into the sky, but then I move the column up to meet his co-ordinates, so Wander lands safely on the column high above the arena.

First fallen column at Cenobia's arena
We see a great view of the arena from this high vantage point. I then move the column up and down in front of Nomad's temple to get a better look at it. Next I then move the column up to high into the sky, so high there is nothing but void to see... Wander falls off the column (my mistake) and falls down towards Cenobia's arena... all looks lost for Wander, but then he column appears below him!
So even when I made a mistake, I could always fix it as I can move the column up and down instantly while Wander is still falling! Note: I was WWWArea who first worked out how to do this with a save stone! That is, use a solid object in the game and move it up and down, or scale it etc.
At 3:05 in the video I tried something else. I tried to make an upright column level. This created some weird effects as you will see. The column seems to shift between being upright and level... like it doesn't know which way to be? I thought this would be a great way to 'throw' Wander miles away as the column moved like a seesaw... but in the end it didn't really work as I had hoped.
291) F5 Colossal Tree at #1's Arena - Uploaded 10th December, 2009
Here I chose one of the trees you see at the first colossus arena and found its scale values so I could increase its size and play around with some ideas. So I make the tree much larger, too large in fact as you can see it flashes on and off, this usually happens when you increase an object past double its size. I had moved the tree in the hopes that Valus would walk into it and make it fall over but sadly my positioning was a little off, so the colossus just walks past it without anything happening... I should have tried again but the video then cuts to a view of an even bigger tree! A tree so enormous you can see it from the entrance to arena towering up into the sky!
By the end of the video I've made the tree so large it almost fills up the entire arena! I warp Wander up into the sky then float down with the parachute to showcase this truly colossal tree ; )
292) F4 Shrine of Worship Statues - Uploaded 10th December, 2009
Here I have moved each idol statue out of its enclosure and moved them closer together leaving a narrow path for Wander to run along. It's very strange seeing the statues like this and you can better appreciate their size and details. Then I move all of them down so only their heads are poking out above the floor of the temple... a little pointless I guess, but I thought it would look cool ; )
Next we are outside of the temple and I've moved the statues out into the sunlight for the first time in centuries! But, I'm making a tower of statues here, like an enormous totem pole! As I move the camera up and down from Wander to the pile of statues over and over, I'm adding a statue each time. But I'm not sure if I stacked all 16... looks like I used eight and then stopped?
The video cuts to a line up of four statues outside the temple. Wander runs past them and looks back, then the video cuts to a new scene? What was I thinking! In any case, now Wander is running the length of the temple with each statue back in its alcove yet only the heads showing again. At the end of the video we see one statue (Quadratus) has not yet been moved down... so I move it down and then pray to it to show that the time attack feature still works. Notice my 'current record' stands at 4:18 from the time limit of 4:30 xD.
293) F5 Modding Valus - Uploaded 10th December, 2009
Continuing on from the previous 'Colossal Tree' video above (291), here I have found all the position co-ordinates of the trees at the first colossus arena (Valus). I have lined them up so that when the colossus is triggered it will walk into them and knock them down. I then trigger the colossus and watch how it knocks over some of the trees!
Then I stand on a fallen tree and start to move it up, and up again etc... Cut to Valus walking towards me, Valus seems confused and doesn't keep moving beyond the strange floating tree! At 1:47 we see Wander hanging from the arm ledge of the colossus, then at 1:51 Wander jumps over the tree (in a amazing move) and grabs back onto the arm ledge! I don't think I did this on purpose, was just a happy accident!

Wander on the floating tree with Valus (360p video capture from the video)
Next I have put Valus into a continuous jumping mode while I position Wander ready to see Valus knock down the trees from a different perspective. Wander shoots a few arrows to gain its attention then Valus knocks the trees down and is about to strike Wander with its club... but I just shift it back into jumping mode! This seems to be before I figured out how to freeze a colossus.
At time index 3:50 we see my first ever attempt to move a colossus beyond the bounds of its arena! Of course Valus just falls through the ground... you see how I try a few times in different locations hoping that one will work, but of course, at this early stage I still had a lot to learn about how to move the colossi out of their arenas! Lastly, I'm moving Valus around the arena as I have access to its position co-ordinates... and wow! the video frame rates here are so s-l-o-w...
294) C2 Colossal Column - Uploaded 10th December, 2009
Back in Cenobia's arena, I have made one of the columns very large! I jump hack Wander up to land on the top of this enormous column. I think I made the column about 10 times its original size. So Wander looks down from this very high vantage point onto the 14th boss arena. I then jump down and grab onto one of the ledges of the column - Wander seems like an insect compared to the huge scale of the column and the small handholds now look like ledges Wander could stand on.
Next, I'm at the path leading to Cenobia's temple, but the colossus isn't there. I made this video when the colossus was absent, so I could concentrate on what I was modding without being harassed by Cenobia. I jump hack onto Cenobia's temple then look back at the huge column. I make it bigger and bigger until it fills up the entire horizon!
295) C2 Mini Column - Uploaded 13th December, 2009
Another video from the same arena, this time I've reduced the size of a column. First I use the fallen column (there is only one), you will notice that when I increase the size of the column (in the above video) the colour gets lighter and here when I reduce its size it gets darker. This also happens when you increase or reduce the size of a colossus. So I make the column smaller and smaller until it looks like a dark log lying on the ground. Next I chose a standing column and reduce its size, even at half size Wander can still climb it. I make it smaller (a little higher than Wander) but now I can't grab onto it. I make it even smaller (a little lower than Wander's height) until finally I in flash, the column turns back to its original size, pushing Wander off balance in the process ; )
296) G2 Pelagia's Tower - Uploaded 13th December, 2009
As in video 283 (Barba's Tower) here I am doing the same thing but this time moving around the gazebo structures at Pelagia's lake. That is, I found the position co-ordinates of the structures then start stacking them one atop the other to make a high tower. You will notice at 1:18 in the video Pelagia moving up and down in the lake, this was to keep it from attacking Wander whilst I worked on creating the tower ; ) Next I jump hack up high then float down to get a closer look at the tower, first next to the tower then right through its center... but again there is no collision detection as I have only moved the 3D models of the structures and not their collisions.
You may also notice Agro standing down on the bottom of the lake at time index 2:07, I had warped the horse to one of the gazebo structures but it had fallen off it seems... so I move it back up next to Wander. I move Agro to the center of the platform in the hopes she will be safe there and take a final look at the tower. Note: the tower at the end of the video is higher than the first as I had made some adjustments to it.
297) G2 Pelagia Save Stone Platform - Uploaded 17th December, 2009
It was WWWArea who first found the 'scale' values of a save stone. From this he could modify or stretch the save stone out into a flat plane. So in this video I have used his methods to stretch out the 'Misty Falls' save stone at G2. First I stretch out the save stone then move it down a little next to the waterfall, but Wander dies!
I once saw a Youtube video (now lost) where you could see Pelagia 'in front' of the arches... that is in the lake where the waterfall is... this was the purpose of this video as I was trying to recreate it, and at 1:54 in the video we see this strange effect! But it's just an optical illusion as what we are seeing is the colossus behind the arches, but we are far enough away that it looks like the colossus is in front of them!

Screen shot from the video - I intend to make a higher res image!
Next, I have moved the save stone platform up to the level of the arched gateway to get a closer look at it. Sadly, the entire arched bridge has no collisions... this enigmatic structure was the subject of much speculation in the early days. Players wondered if there was a way to traverse this bridge and somehow find a path to the Eastern lands!
I move the save stone platform up until I'm right at the center of it... now we can see that there are no surfaces on the top of the arched bridge, yet strangely the 'sides' of the columns still have collisions? It's much like what we see at the upper levels of the Shrine of Worship, that is the sides of the temple still have collision surfaces, but the top surfaces do not? At the end of the video I try to make Pelagia land on my save stone platform but it doesn't work... I have moved the save stone beyond its limits so it disappears and Wander falls into the lake.
298) E6 Modding Phalanx - Uploaded 19th December, 2009
I start out by moving Phalanx down just above the surface of the desert sands. When I move Phalanx or any of the snake type colossi around their tails invariably twist and turn in strange ways... Next Phalanx is curled up into a spikey ball of protuding wings and body parts which has some weird effects on the camera view, but eventually Phalanx does what I intended and starts surfing over the sands much like how the 10th boss Dirge does. You'll notice I look down at the sand from time to time then look back up, this is to reset the bloom effect which in this arena can be quite intense.
On foot, Wander runs up the ground surfing colossus and tries to grab on but fails! But he does touch one of the wings for a second or so causing the music 'Counter Attack' to start. Then within just a few seconds, Phalanx dives into the sand as it does in normal play once you have climbed onto it. So I try again, this time on Agro and ride right up in front of Phalanx's head, narrowly missing it! I then leap off Agro onto its back and start surfing this crazy ground level version of Phalanx ; ) I run up and take position on its head, crouching down for stability and then just watch what happens. You can see how my emulator was struggling to record some parts here...
Then I shift Phalanx high up into the air, Wander is thrown up but seems to have passed through the colossus as we see him falling back to earth and Phalanx is untangling itself high above (again the tail twists and turns in strange ways). Lastly, I have the colossus standing upside down in a vertical position; seems I did this for most of the colossi I modded xD. Again, you can see it untangling and moving in strange ways. Then all of a sudden as I level it out, I am punished for my blasphemy! (that is for messing with this gentle giant) as Wander and Agro are thrown into the void below the desert and killed when they hit the death floor!
299) E2 Modding Gaius - Uploaded 19th December, 2009
In my earlier attempts at this arena I had warped Wander to the sleeping colossus only to wake it up, but there is a safe place to land that won't wake the sleeping giant! I'm not sure who it was that first discovered this spot but I think it was Pikol who first landed there in a video? In any case, I learnt that the stone bracelet of Gaius was solid so I worked out how to land there. Then I jump down right in front of the Knight's face and watch as its eyes change from darkness to 'life'! You only get a short glimpse of this before the cutscene starts, but it shows that when the colossi are sleeping or 'de-activated' they are basically dead.
So I start modding the colossus! First I warp Gaius up into the sky, then start messing with its position co-ordinates... it looks like Gaius is dancing or stretching out in weird ways! I break its arm bracelet (as normal) then slowly push the colossus out to the edge of the circular platform - until it falls into the lake and disappears! Wander tries to follow by jumping down into the lake, but by this time Gaius would have already fallen past the death floor (-300m) and continued to fall down ad infinitum.
Next I jump up onto its back fur and hold on while I warp the colossus back out past the circular platform, the colossus falls into the lake and beyond, while Wander floats back up to the surface. Pretty cool! Then (by a mistake) I made 'Paper Gaius'! That is, I changed the wrong address and we see this weird flat 2D version of Gaius! I have called it this from the Youtube comments of the time! I've also increased it size too much, hence you can see it bobbing up and down. Still, this accident is still interesting to watch all these years later as I never re-created this effect. As you can see in the video, I can't even land on 2D Gaius! At the end of the video I've squeezed the colossus up so much it disappears and only some remnants of the stone braclet are left... things I can't honestly remember doing now! I think I just kept on modding (hacking) to see what would happen.
300) F4 Mini-Mega Agro - Uploaded 19th December, 2009
I was bound to happen! I mean I had changed the scale codes of a tree and a save stone, I had even scaled one of the colossus (Kuromori)! So in this video I use the scale codes on Agro - first by making the horse into a tiny little pony! Sadly, I could never work out how to scale its mane, reins or tail... so we see a tiny horse with normal horse sized mane, reins and tail - which looks quite unusual yet very cute! I make Agro about a third of the size of Wander... but only the half sized horse can carry Wander around. Smaller Agro seems to move more slowly as well based on its smaller frame... I then increase Agro's size to twice its size! Now Wander seems to be a small person on a large horse.
I then change Agro in a 'Paper' version as well (as in the above video), then a colossal Agro! Until finally I reduce her to normal size and pet her... to let her know all is OK again ; )
Well, I hope you have enjoyed this second blog post (150-300)! It has taken me months of work to complete, but I think the results will speak for themselves (as they say). I still have two more to go (150 each!) I mean, we haven't even reached the year 2010 yet! Damn, I made so many videos back at the start! Take care all. My next blog post will be posted some time in the near future ; )